Content Library
The Content Library in Resonate provides you with a complete repository of both organic and paid media content published from your campaigns. You can easily browse, edit, sort, and download assets, and with one click, navigate directly to live posts.
Additionally, the Content Library allows you to seamlessly share content with others, both within and outside of Resonate, using generated links. It’s designed to make accessing, editing, and distributing your campaign assets simple, helping you maximize the impact of your content.
IN THIS ARTICLE
Getting started
1. Log into Resonate—our technology platform
You will have received an email invite to set up an account in Resonate. Use your Resonate email & password to log in.
2. Navigate to the Content Library
Click Content Library in the top navigation.

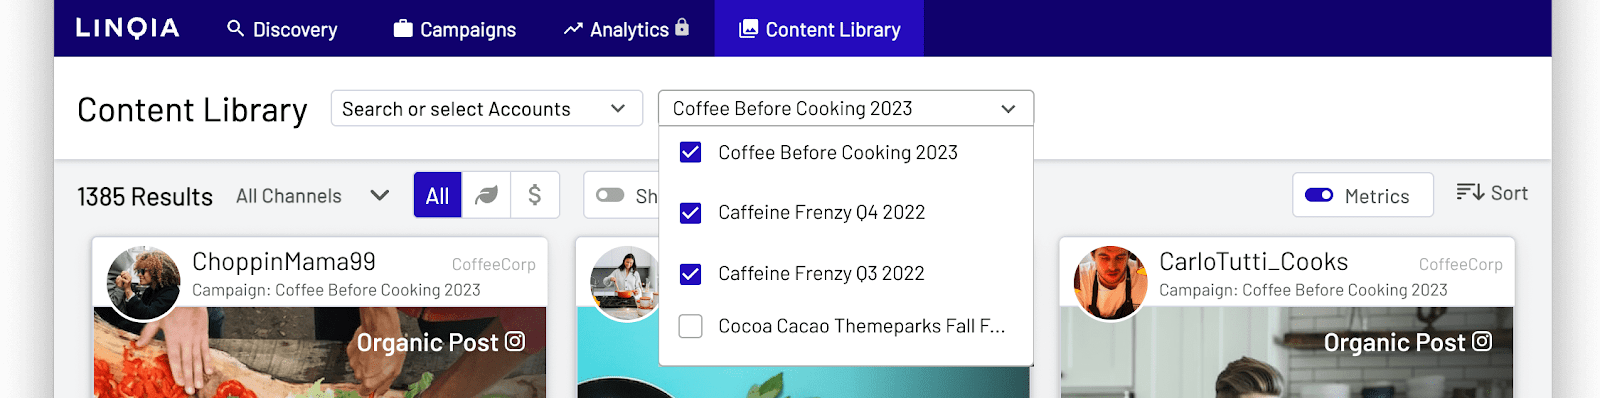
3. Select accounts and campaigns
Use the first dropdown to choose from any accounts and sub-accounts you’re part of. The second dropdown allows you to select a specific campaign’s content or view all content across campaigns.
Browse and filter content
Each piece of content is displayed in its own card, featuring key details like the creator’s handle, campaign name, post type, posting date, and usage expiration date. Additionally, click the external link icon to navigate directly to live content.
Refine your results by filtering for organic or paid content and specifying social media platforms. You can sort the content by engagement rate, impressions, publish date, or expiration date. Additionally, use the toggles above the results to hide overlaid metrics or expired content for a cleaner view.
Download content
Follow these steps to download content. You’ll receive an email with a zip file containing the selected assets.
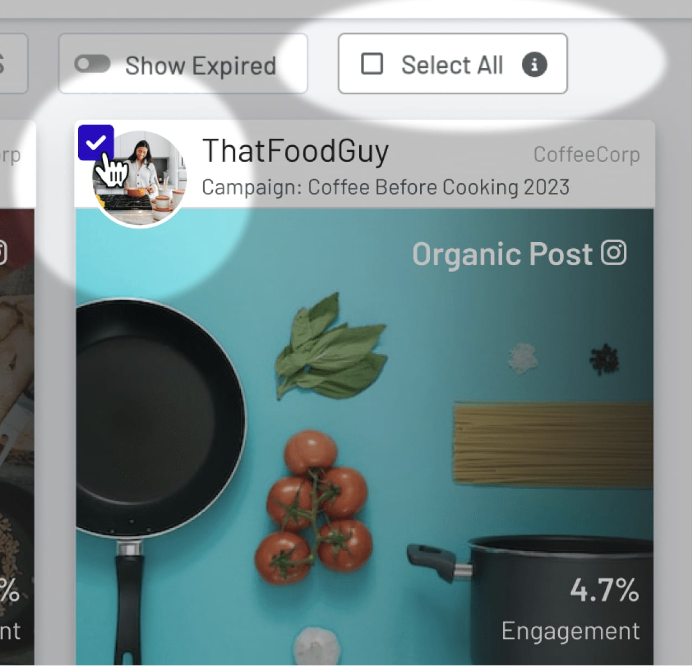
- Hover over a piece of content and click the checkbox in the top-left corner to bring up the share menu. You can also select Select All to choose all content.
- Once you've made your selections, click Download Content at the bottom right of the page.

Edit content
Resonate’s video editor allows users to edit videos, change aspect ratios, and export video content directly in the platform. Accessible from Content Library and Analytics, this feature streamlines content customization and enhances flexibility.
- Navigate to the Content Library to find campaigns active or completed.
- Select the appropriate sub-account and campaign, and apply filters as needed.
- Locate the video you want to edit, click the three-dot menu (⋯) and select Edit with Resonate Studio from the post view.
- After editing, click Export to save your changes.

When you click Edit Video from any access point, the video editor will open in a new tab. From there, you can make your edits and hit Export once you're ready to save the final version.
Navigating the Editor: What You Can Do
-
Edit Your Clips
Use the Media tab to drag and drop clips into the timeline. You can trim out long pauses, split a clip in two, move things around, resize them, or rotate clips as needed.
-
Change Aspect Ratios by Platform
Easily switch aspect ratios depending on where your video is going, 9:16 for TikTok, 16:9 for YouTube, 1:1 for Instagram, and more. Custom resolution calls for a number of pixels.
-
Text
This tab allows you to add text overlays.
-
Add Transitions
Make your video pop with built-in filters, visual effects, and transitions between clips.
-
Subtitles
Assets gone through Content Review is encoded with an .SRT file, so each piece of
content has subtitles ready to go at the appropriate second.
-
Use Timeline Tools
Use playback controls to preview your edits, zoom in or out on the timeline, and manage multiple layers like video, text, and audio.
Layers let you stack clips (e.g. background video, overlay text, audio).
-
Export Your Video
When complete, just click Export to download your finished video.

💡 Tip: Use keyboard shortcuts to speed up editing:
- Space bar – Pause/play
- S – Split the clip
- Delete – Remove a selected section
Common use cases
|
Category |
Use Case |
How to Do It |
| Video Enhancement | Trim dead space and long pauses | Use timeline trimming handles to cut unnecessary sections or split and delete clips |
| Video Enhancement | Add zoom cuts for product highlights | Select a clip in the timeline, click Animation, and pick an option. Scale up animations can add zoom in effects. |
| Video Enhancement | Insert transitions between clips | Pick a transition and drag in between clips in the timeline |
| Video Enhancement | Add text overlays and captions | Click Text to add text layer, then customize content |
| Video Enhancement | Overlay music to increase engagement | Upload music file in the Media tab and drag onto audio layer in timeline |
| Subtitles | Include subtitles | Use the subtitle tab to add, edit font, size, and color |
| Aspect Ratio Optimization | Customize aspect ratios for different placements (organic + paid) |
Set desired aspect ratio before editing or via export settings 9:16 for TikTok 16:9 for YouTube or horizontal 1:1 for Instagram 4:5 (1080x1350) for Meta ads |
| Brand Compliance | Add #ad, #sponsored, or #brandpartner disclosures | Use text overlay tool to implement |
| Brand Compliance | Ensure proper product callouts | Use text or zoom to highlight product clearly |
| Brand Compliance | Add brand-specific text (e.g., campaign taglines, fonts) | Customize text overlays to match brand guidelines |
| Advanced Editing | Stitch multiple clips together (retakes, alt angles, etc.) | Upload clips in Media tab → Drag to timeline in sequence |
| Advanced Editing | Replace voiceover | Mute existing audio → Upload new voiceover → Drag to audio track in timeline |
Share content
To share content with anyone outside of Resonate, simply follow these steps. All you need is their email address, and Resonate will send them a public viewing link.
- Hover over a piece of content and click the checkbox in the top-left corner to bring up the share menu. You can also select Select All to choose all content.
- Once you've made your selections, click Share Content at the bottom right of the page.
- Enter the email address(es) of the recipients, pressing Enter after each one.
- Set the link expiration time (after which the link will no longer work). You can also toggle options to display metrics and allow recipients to edit and download the content. Optionally, add a note, then click Email Link to send.

Please note: You may not share content with expired usage rights. The expiration date for usage rights can be found within each content card under the date the post went live.